
My FIEA Portfolio
Portfolio Piece 1: Bang!

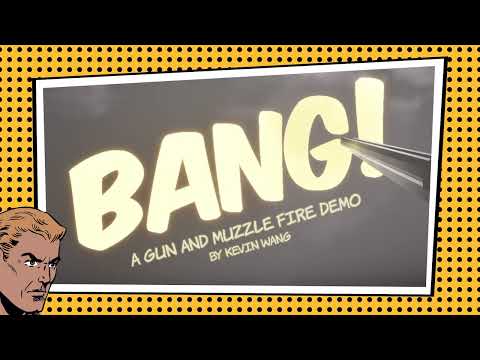
“Bang!”, my senior project that I made to present at UF Digital World’s 2026 Convergence, is the culmination of four years of experience and effort rendered in Unreal. It’s a muzzle flash and gunfire VFX demo; by it’s the biggest solo project, if not the biggest project, I’ve ever tackled. Here I took one an Unreal project where I both had to make the vehicle for the main show: VFX, and the VFX themselves. It was a three-to-four-month long process of both teaching myself new things and implementing the things that I learned already.
The premise of “Bang!” is that it is a gunplay demo made to show off a suite of comic book style gunfire effects. It was inspired by the art styles of games like Wolf Among Us, Sam and Max Saves the World, and Black Saad. For this project, I made the VFX, materials, animations, and the programming/blue printing. All other assets were used with the right and necessary permissions.
VFX:Niagara Systems
The main meat and potatoes of the showcase, or it was intended to be. During the process I found that making VFX was the easiest and quickest part. It was also the most fun.


Word Art FX

The “Word Art” or “Word Balloon” FX is by far the highlight of the FX demo and really sells the comic book theme of the VFX suite.
It’s deceptively simple, but most of the actual glam comes from the workflow and how it calls the specific mesh!
With the workflow I made, you don’t even need to know how to model. You can create the words in editor, then just drag and drop, and it should automatically input the new meshes into the Niagara System/Component!


Third: Merge the Actors, this turns it into a Static Mesh
Fourth: Drag and drop the new Static Mesh Object into a specific folder (this folder gets called by a blueprint later).
In a blueprint, the specific file folder path is called and all the assets placed in that folder are called and put into a static mesh array variable. That variable is then called by a node that sets a user parameter in the specific “Word Art” Niagara System via Niagara Component.
The mesh renderer is the bound to this specific user parameter, allowing it to call the assets from the associated folder.

Why Static Meshes
I chose to use static meshes instead of sprites because I DIDN’T want the effect to rotate. That way to it felt like was an actual element of the environment rather than a sticker superimposed on the player’s screen.
Why go through the trouble of the file asset path system?
When I made this system, I originally wanted to make it so that you could select the specific meshes from the editor. This wasn’t for my sake of course, as I was familiar with just working with Niagara.
This was my attempt at making a tool, or system, that a hypothetical teammate could use without having to dive deep into the system. They would have had to select the specific word they wanted via a drop-down menu.
Unfortunately, I didn’t have the time to fully implement this, as I had to tackle the other parts of the project. Nevertheless, I’m still proud of what I made here and it really did make the process easier.

The FX that is front and center of the demo, the muzzle fire is one that I spent most of my creative attention towards. In keeping with the theme of comic book effects, the “fire” is cartoony with clear outlines.


Lastly there is the sparks component, which emits multiple elongated sprites (the same one in the flash component) in a fountain like manner.
Each part of the original system is modifiable, including scale, color, emission, and much more. All of this can be edited from the editor via blueprint. All together this creates a muzzle flash effect straight out of comic book!
Bullet Holes and Texture 2D Arrays

From here one out the rest of the effects are pretty simple as their use cases are similar. One thing that I do want to point out is the use of Texture 2D arrays.
Texture 2D Arrays allowed me to create various versions of one sprite from one image file, saving me a lot of time and file space. It does this by taking an image with multiple versions of a detail, then with UV coordinates and parameters it slices it up and assigns each an index. Usually this is used for flipbook animations; Here I used it with a bullet hole decal.
Smoke Effects

I used the 2D texture array method for the smoke puff that comes with the shotgun for some added variety.
While it isn’t the most obvious effect, especially in dim settings, it does add a sort of realism and grounding to a mostly cartoony effect. The smoke puff also helps show the emissive glow of the shotgun muzzle FX in the dim settings better!

Hit Impact

I made two versions of bullet impacts FX, one for bullets hitting the environment and one for hitting targets. The actual components of the FXs are parts of the other FXs (Smoke puffs, sparks, Word Art). For the former I also added a rock fountain component using the following texture array.

Animation
Originally, I wanted to keep the project to VFX only. However, when I was looking for assets to use for this project, I was left wanting. The models I found that did match were either not rigged or animated. The ones that had animation or were rigged, were done terribly so the models were wonky. In the end I took the models that were modeled properly, rigged them blender, and then animated them in Maya.
Having done animation and rigging in the past, it was a nice refresher and the work I did was of quality work.
Below is a snippet of all of the animations in the game:


Blueprints
I made the whole gunplay system from the ground up (barring movement). However, there is one thing I must confess. When I made this system, it was originally intended to be smaller than what I have now. I didn’t know the size and complexity of the blueprints I would make, and so I made most of the blueprints under the BP_FirstPersonCharacter Blueprint. It’s not the best way to do this and if I were to do this project again, knowing what I know now, I would have made each gun an inheritable object under a blueprint class.
Still, it worked for this demo and by the time I recognized this it was too late in the development process, and the showcase was around the corner.
Unfortunately, there’s too much to cover here but I will still provide a screenshot of most of the blueprints and functionality for you to see:
General View

Reload 

Weapon Scroll
 Revolver Logic


 Tommy Gun Logic


Shotgun Logic 


Conclusion:
The items here are only a portion of the actual contents of what I worked on in this project. Again, this was the largest project I ever did, and I tackled it solo. I didn’t go over the target logic, lighting interaction or the myriad other things that I did. If I were to go over them, this document would be a lot longer and because I respect your time, I only covered the major and relevant parts. Still, I hope that this document conveys both the effort I put into this project and the fun I had fleshing out this system!
Bang was probably the biggest project I ever took on and as such I believed it deserved an in-depth explanation; while I could have done some parts better, overall I liked the project.
Portfolio Piece 2: Acid Splash FX
Acid Splash was my second time making something in Niagara. Inspired by the countless amount of Magic FX I saw while browsing Artstation, I made my own take on an acid bomb spell.
Portfolio Piece 3: Ominous Orb
I included this piece as it was one of the first things I’ve ever done in Unreal (that I liked enough to keep around). It was made as a submission to a unreal environment creation jam. It was also the first time I really dug my hands and work in Niagara and Unreal’s Material Editor. For the purpose of saving time, I’ll only go into my work in the material editor and Niagara Systems.
The obvious anchor piece is the orb in the center of the scene. For most of this effect, most of the magic is done in the material editor and compiled in Niagara. It’s a noise texture stacked onto each other, with its UVs coordinates panned and moving. This data is taken into the materials Emissive Color and Opacity inputs, with an added addition of particle color data from the Niagara System itself. That same data is also offset and multiplied by Normal Vertex data and plugged into the World Position Offset node to give it the jitter and “wavy” effect you see.
Portfolio Piece 4: Nuclear Flash Helmet


For me, it had a striking and distinct look that differentiated itself from the usual gas masks and visors you often see online.
For me though, one of the challenges of modeling this was trying to find some good reference images (ones that show a flat top and bottom Image). This inadvertently led me to make some creative changes that in retrospect, I’ve come to like.

The model itself is broken into several different pieces. This was all in an effort to make each part a little easier to UV. I had ten UV sets by the time I was done.
From there it was off to Adobe Substance 3D painter. Here I used a yellow and blue colors scheme to give it a contrasting look that would stand out, as well give it a sci-fi experimental look. I also added emissive glow to certain parts to help further the futuristic look.

For certain parts I used anchor points to get the correct edges, and I made a smart mask to add “stitching” to the edge of one portion of the gas mask to make it seem connected to the other. This is the dark blue outline one the intersecting points between the two pieces.

I also used stencils to create details like paint, indents and screws on various parts of the mask. (See Below)
BONUS:



No comments:
Post a Comment